By: SURYA TEJA P – Centroid Senior Consultant
Oracle BI Cloud Connector (BICC) is Oracle Fusion’s data extraction framework for exporting business data to UCM or OCI Object Storage for reporting, analytics, and integrations. It supports both full and incremental loads, automated scheduling, and integration with downstream platforms such as data warehouses and reporting tools.
Prerequisites
-
- Required Fusion security roles
- Access to the BICC Administration Console
- Identified Data Stores (PVOs)
- Configured UCM or OCI Object Storage destination
- Defined extraction requirements and frequency
Process Overview and Core Architecture
This technical guide provides an end-to-end operational procedure overview for configuring offerings, data stores, external storage locations, and extraction schedules within Oracle Business Intelligence Cloud Connector (BICC) for Oracle Fusion Applications. BICC provides high-volume, automated extraction of Oracle Fusion cloud data into external storage systems such as Oracle Universal Content Management (UCM) and Oracle Cloud Infrastructure (OCI) Object Storage. It operates on an incremental extraction framework, utilizing specialized Oracle Fusion View Objects (VOs)—referred to inside BICC as Data Stores—to package data into compressed CSV files.
| IMPORTANT ARCHITECTURAL NOTE: Incremental loads reduce overall processing time and network data volume by only capturing updated or newly inserted records. Resetting the ‘Last Extract Date’ forces a complete historical reload and should only be performed when explicitly required for data synchronization. |
1. Accessing the BICC Administration Console
To configure extraction schemas, administrators must access the BI Cloud Connector Console directly.
Step 1.1: Log in to Oracle Fusion Applications
Navigate to the Oracle Fusion Application sign-in portal (e.g., https://hostname.oraclecloud.com) and authenticate using administrator credentials.
Step 1.2: Launch BI Cloud Connector Console
Copy the application URL up to the root domain name and append /biacm to the end of the web address (e.g., https://hostname.oraclecloud.com/biacm). Open this URL in your web browser to launch the Oracle Business Intelligence Cloud Connector Console.
2. Creating and Managing BICC Offerings
While Oracle delivers standard out-of-the-box offerings (such as Financials, Human Resources, or Supply Chain Planning), enterprise integrations frequently require bespoke data structures. Setting up a custom Offering allows developers to group a specific subset of Public View Objects (PVOs) for targeted delivery.
Follow these steps to set up a custom BICC Offering and associate specific Data Stores (PVOs):
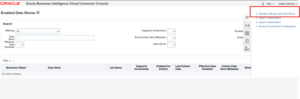
1. Navigate to the right-hand action drawer and select Manage Offerings and Data Stores to open the configuration interface.
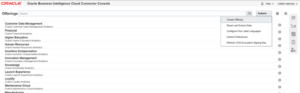
2. From the top-right Actions menu, select Create Offering to launch the offering creation wizard.
3. In the Create Offering screen, enter a unique Offering Code and Offering Name (e.g., XXCENAIDP_CUS).
4. In the Associate Data Store section, use the Filter search bar to locate specific Public View Objects (PVOs).
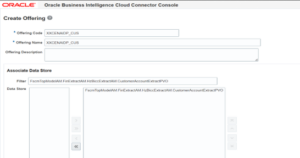
5. Select the required Data Stores from the list and move them into the associated list block.
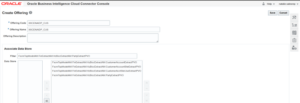
6. Click Save in the top-right corner to persist the offering configuration.
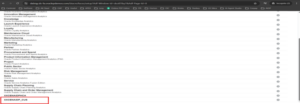
7. Locate the newly created offering in the Offerings list and review its associated data stores.

3. Optimizing Data Extraction: Incremental Loads & Full Resets
BICC relies on the Last Extract Date parameter to perform efficient incremental data loads. Depending on the extraction method used, the incremental state is tracked at different levels:
| Extraction Method | Last Extract Date Scope | Operational Impact |
|
Manage Extract Schedules
|
Data Store level within Offering
|
Controls incremental delta extracts for all runs under Offering schedule. |
|
Manage Jobs & Job Schedules
|
Data Store level within Job
|
Controls incremental delta extracts
local to that configured Job. |
Incremental vs. Full Extracts
- Incremental Runs (Default): BICC evaluates the Last Extract Date timestamp, and only records created, modified, or updated after this watermark are selected.
- Full Reloads: When down-stream schema mismatches or warehouse corruptions occur, a manual override is necessary.
Resetting Delta Watermarks:
If an extraction rerun is required from a historical baseline:
- Data Store-Level Reset: Open the specific offering, locate the target Data Store (e.g., CustomerAccountExtractPVO), click the Actions (Gear) icon on the right, and choose Reset to Full Extract. This forces a full reload only for the selected entity during the subsequent run.
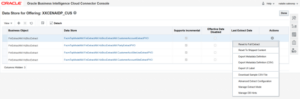
- Offering-Level Reset: Select the custom offering from the master list, click the Actions (Gear) icon on the right, and choose Reset to Full Extract to clear the watermark for all child data stores.

4. Establishing Handshake: Target Storage Infrastructure
BICC does not store extracted files internally. Before executing extraction schedules, ensure target external storage destinations are configured under the Configure External Storage tab:
- Universal Content Management (UCM): Standard built-in Oracle Fusion content repository.
- OCI Object Storage Connection: Configure Host, Namespace, and Bucket details (e.g., sodevopsd013 / DS-BI-Usage) for seamless cloud object storage integration.

5. Automated Orchestration Path A: Manage Extract Schedules
The Manage Extract Schedules mechanism is the traditional orchestration path in BICC, ideal for straightforward, offering-scoped extractions.
Step-by-Step Schedule Creation
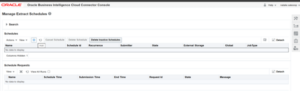
1. Open the right-hand panel and click Manage Extract Schedules.
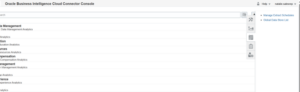
2. On the Schedules table, click the ‘+’ (Add) button to launch the schedule wizard.
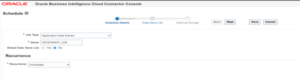
3. In Step 1 (Schedule Details), select Job Type (e.g., Application Data Extract), enter a Name (e.g., XXCENAIDP_JOB), and set Recurrence (Immediate, Hourly, Daily, etc.). Click Next.
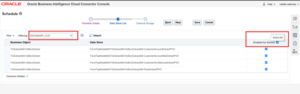
4. In Step 2 (Data Store List), select your target Offering (e.g., XXCENAIDP_CUS) and check the Enabled for Extract box (or Select All). Click Next.
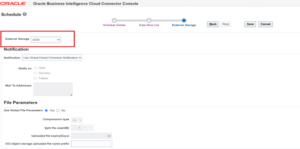
5. In Step 3 (External Storage), select the target External Storage destination (e.g., UCM or OCI Storage), configure file parameters, and click Save.
6. In the Manage Extract Schedules page, filter by Type (Immediate/Recurrence) and click Search to verify state and execution progress (e.g., SUCCEEDED).
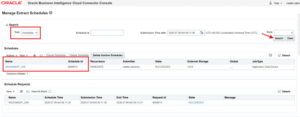
7. Log into the corresponding external target (such as UCM) and execute a search query using the exact Schedule ID to fetch and validate the generated zip archives.
6. Automated Orchestration Path B: Manage Jobs & Job Schedules
For advanced deployments requiring modular, multi-offering task packaging, BICC introduces the Manage Jobs and Manage Job Schedules flow. This decouples the extraction configuration (the Job) from its execution properties (the Schedule).
Step-by-Step Job & Schedule Definition
Step 6.1: Define BICC Job
1.Select Manage Jobs from the right-hand drawer and click Add (+).
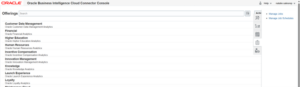

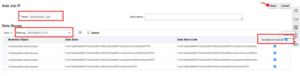
2. Specify a meaningful Job Name, associate the required Offering, enable desired Data Stores for extraction, and click Save.

3. Open the job configuration to verify associated data stores and extract settings.
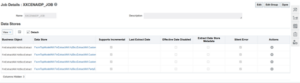
4. In this paradigm, BICC maintains the Last Extract Date specifically at the Data Store level inside the Job.
5. If a full refresh is required for this specific sequence without disrupting other schedules, open the Job configuration, locate the data store, and trigger Reset to Full Extract within this Job scope.
Step 6.2: Create Job Schedule & Monitor Execution
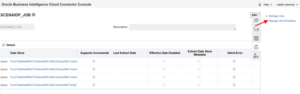
6. Select Manage Job Schedules from the right drawer and click Add (+).
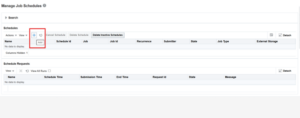
7. Select the target Job, set Job Type, Schedule Name, External Storage destination, and Recurrence parameters.
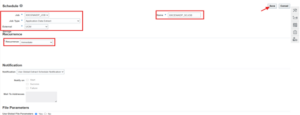
8. Click Save to initiate or schedule the job.
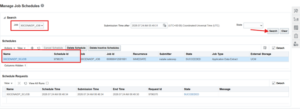
9. Filter by Job name in the execution table to monitor progress.
7. Validating Extracted Files
- Once your extract job finishes with a SUCCEEDED status:
Note the Schedule ID or Request ID from the execution summary, log in to Oracle UCM or the designated OCI Object Storage bucket, and use the Schedule ID to verify that all generated CSV/ZIP extract files are present and ready for downstream processing.

Operational Best Practices
- Watermark Isolation: Note that the Last Extract Date behaves differently across orchestration paths. Ensure your development team standardizes either Extract Schedules or Job Schedules to avoid conflicting watermark timestamps for shared PVOs.
- Volume Thresholding: For massive tables (e.g., General Ledger journals or Supply Chain transaction tables), utilize the File Parameters step to configure split-file thresholds (typically 1 GB) to prevent download timeouts in ETL/ELT pipelines.
- Network Fail-safes: Configure automated email alerts under the Notification settings of your schedules to proactively flag integration failures (State: FAILED) to support queues.
Conclusion
Oracle BI Cloud Connector (BICC) provides a scalable and reliable framework for extracting Oracle Fusion data for reporting, analytics, and integration use cases. By configuring Offerings, Data Stores, external storage destinations, and extraction schedules, organizations can efficiently manage both full and incremental data loads while maintaining data consistency through watermark management. When implemented using recommended best practices, BICC enables secure, automated, and enterprise-ready data delivery to downstream analytics, data warehouse, and integration platforms.
Centroid Fusion experts specialize in Oracle Fusion BICC configuration, data extraction, and integration strategy, with extensive experience implementing scalable data pipelines across Oracle Fusion cloud environments. The Centroid team brings deep expertise in designing and optimizing BICC Offerings, Data Stores, incremental extraction frameworks, watermark management, and automated scheduling solutions that enable high-quality data delivery for analytics, reporting, and enterprise integrations. Contact us today to explore how Centroid can help you leverage Oracle Fusion to accelerate data workflows, improve analytics and reporting, and optimize data-driven decision making.